Nacos 安装
Nacos 主要职责是服务发现和管理项目配置文件功能,可以查看官网文档了解详细信息。 可以在 官网 下载最新版本进行安装。 后续如果 nacos 版本更新,本文档也会更新下载地址。
注意
Nacos 是一个内部微服务组件,需要在可信的内部网络中运行,不可暴露在公网环境,防止带来安全风险。
以下教程我会以 Linux 系统为例,Windows 系统我们不推荐使用,如果必须使用那么安装步骤大同小异。这里只做最基础的安装教程, 欲了解更多信息,请移步官方文档查看。
版本选择
我们推荐使用 2.x 的最新稳定版本。可以在 官网 下载最新版本进行安装(不要使用 BETA 版本)。
预备环境准备
Nacos 依赖 Java 环境来运行。请确保是在以下版本环境中安装使用:
- 64 bit OS,支持 Linux/Unix/Mac/Windows,推荐选用 Linux/Unix/Mac。
- 64 bit JDK 1.8 及以上版本。
下载安装包并解压安装包
我们推荐将其安装在 /usr/local/nacos 目录下。
unzip nacos-server-$version.zip -d /usr/local
# 或者
tar -zxvf nacos-server-$version.tar.gz -C /usr/local
创建数据库
创建一名字为
nacos的数据库,您可以使用以下 SQL 语句,或者使用 GUI 功能创建数据库。CREATE DATABASE `nacos` CHARACTER SET 'utf8mb4' COLLATE 'utf8mb4_general_ci';使用
nacos/conf/mysql-schema.sql创建 nacos 所需的表。
修改配置文件
# 进入配置文件目录
cd nacos/conf
# 修改配置文件
vim application.properties
1. 修改数据库配置
找到如下配置段,需要将高亮的配置修改成自己的数据库配置。
spring.sql.init.platform配置数据库类型,我们使用 mysql。db.num配置数据库实例个数,我们一般都是 1 个。db.url.0只需修改 ip 地址、端口和数据库名,参数可以使用配置文件的默认值。- 填入数据库的
db.user.0用户名、db.password.0密码。
#*************** Config Module Related Configurations ***************#
### If use MySQL as datasource:
### Deprecated configuration property, it is recommended to use `spring.sql.init.platform` replaced.
# spring.datasource.platform=mysql
spring.sql.init.platform=mysql

### Count of DB:
db.num=1

### Connect URL of DB:
db.url.0=jdbc:mysql://127.0.0.1:3306/nacos?characterEncoding=utf8&connectTimeout=1000&socketTimeout=3000&autoReconnect=true&useUnicode=true&useSSL=false&serverTimezone=GMT%2B8
db.user.0=nacos
db.password.0=nacos
2. 开启鉴权
找到如下配置段,主要修改高亮部分的配置。
nacos.core.auth.enabled配置是否开启鉴权,修改为true。nacos.core.auth.server.identity.key修改为具有足够的复杂度和唯一性的字符串。nacos.core.auth.server.identity.value修改为具有足够的复杂度和唯一性的字符串。nacos.core.auth.plugin.nacos.token.secret.key修改为一个 UUID 的 Base64编码字符串。了解更多# Windows 系统 可以使用 PowerShell 获取: [convert]::ToBase64String([System.Text.Encoding]::UTF8.GetBytes([System.Guid]::NewGuid()))# Linux 系统 可以使用 bash 获取: uuidgen | base64
注意
要确保所有 Nacos 集群节点上 nacos.core.auth.server.identity.key 和 nacos.core.auth.server.identity.value 的配置保持一致, 避免因配置不一致导致的集群问题,要了解这两个参数的更多内容请查看 官网。
#*************** Access Control Related Configurations ***************#
### If enable spring security, this option is deprecated in 1.2.0:
#spring.security.enabled=false

### The ignore urls of auth
nacos.security.ignore.urls=/,/error,/**/*.css,/**/*.js,/**/*.html,/**/*.map,/**/*.svg,/**/*.png,/**/*.ico,/console-ui/public/**,/v1/auth/**,/v1/console/health/**,/actuator/**,/v1/console/server/**

### The auth system to use, currently only 'nacos' and 'ldap' is supported:
nacos.core.auth.system.type=nacos

### If turn on auth system:
nacos.core.auth.enabled=true

### Turn on/off caching of auth information. By turning on this switch, the update of auth information would have a 15 seconds delay.
nacos.core.auth.caching.enabled=true

### Since 1.4.1, Turn on/off white auth for user-agent: nacos-server, only for upgrade from old version.
nacos.core.auth.enable.userAgentAuthWhite=false

### Since 1.4.1, worked when nacos.core.auth.enabled=true and nacos.core.auth.enable.userAgentAuthWhite=false.
### The two properties is the white list for auth and used by identity the request from other server.
nacos.core.auth.server.identity.key=BasicPaperCloudNacosServerIdentityKey
nacos.core.auth.server.identity.value=BasicPaperCloudNacosServerIdentityValue

### worked when nacos.core.auth.system.type=nacos
### The token expiration in seconds:
nacos.core.auth.plugin.nacos.token.cache.enable=false
nacos.core.auth.plugin.nacos.token.expire.seconds=18000
### The default token (Base64 String):
nacos.core.auth.plugin.nacos.token.secret.key=
服务注册
- 创建配置文件
vim /usr/lib/systemd/system/nacos.service- 填入以下信息,高亮部分您可以需要修改。一定要注意安装路径,我们推荐的安装路径为
/usr/local/nacos,如果一直下面的配置可以直接抄。
注意
以下是单机版服务注册的配置,如果使用集群版需要将 -m standalone 修改为 -m cluster。
[Unit]
Description=nacos
After=network.target

[Service]
Type=forking
User=root
ExecStart=/usr/local/nacos/bin/startup.sh -m standalone
ExecStop=/usr/local/nacos/bin/shutdown.sh
PrivateTmp=true
LimitNOFILE=65535
LimitNPROC=65535

[Install]
WantedBy=multi-user.target
参数详解
| 参数 | 说明 |
|---|---|
User | 启动这个服务的用户名,切记要修改成你的用户名,如果中途切换用户名记得修改文件权限。 |
ExecStart | 启动服务的命令,这里我们使用 -m standalone 启动单机版,如果要启动集群,请使用 -m cluster。 |
ExecStop | 停止服务的命令。 |
- 输入
:wq保存文件。 - 使用
systemctl daemon-reload命令可以刷新配置信息 - 使用
systemctl start nacos.service命令启动服务。 - 使用
systemctl status nacos.service查看服务状态。 - 使用
systemctl enable nacos.service设置为开机自启。返回类似
Created symlink from /etc/systemd/system/multi-user.target.wants/nacos.service to /usr/lib/systemd/system/nacos.service.的消息,代表注册成功!
其他可用命令
systemctl stop nacos停止服务systemctl disable nacos.service禁用开机自启
修改用户名和密码
注意
禁止使用默认密码!禁止使用默认密码!禁止使用默认密码!重要的事情说三遍。
登录后台管理系统
- 打开浏览器,访问
http://localhost:8848/nacos/。 - 使用默认的用户名和密码登录管理系统。默认的用户名和密码都是
nacos(2.4.0之前版本)。
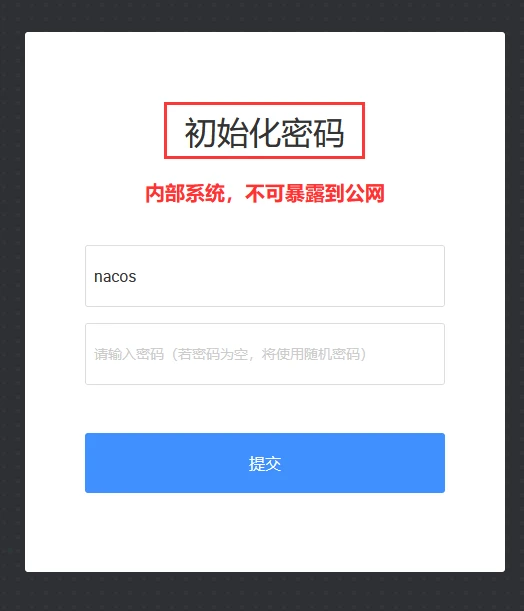
注意
从 2.4.0 开始支持首次登录设置初始密码,如看到以下页面直接设置新的密码即可。
相关信息
如果无法访问,那么需要将 8848 端口加入防火墙白名单。
# 打开 8848 端口
firewall-cmd --permanent --zone=public --add-port=8848/tcp
# 重启防火墙
systemctl reload firewalld
修改 nacos 用户密码
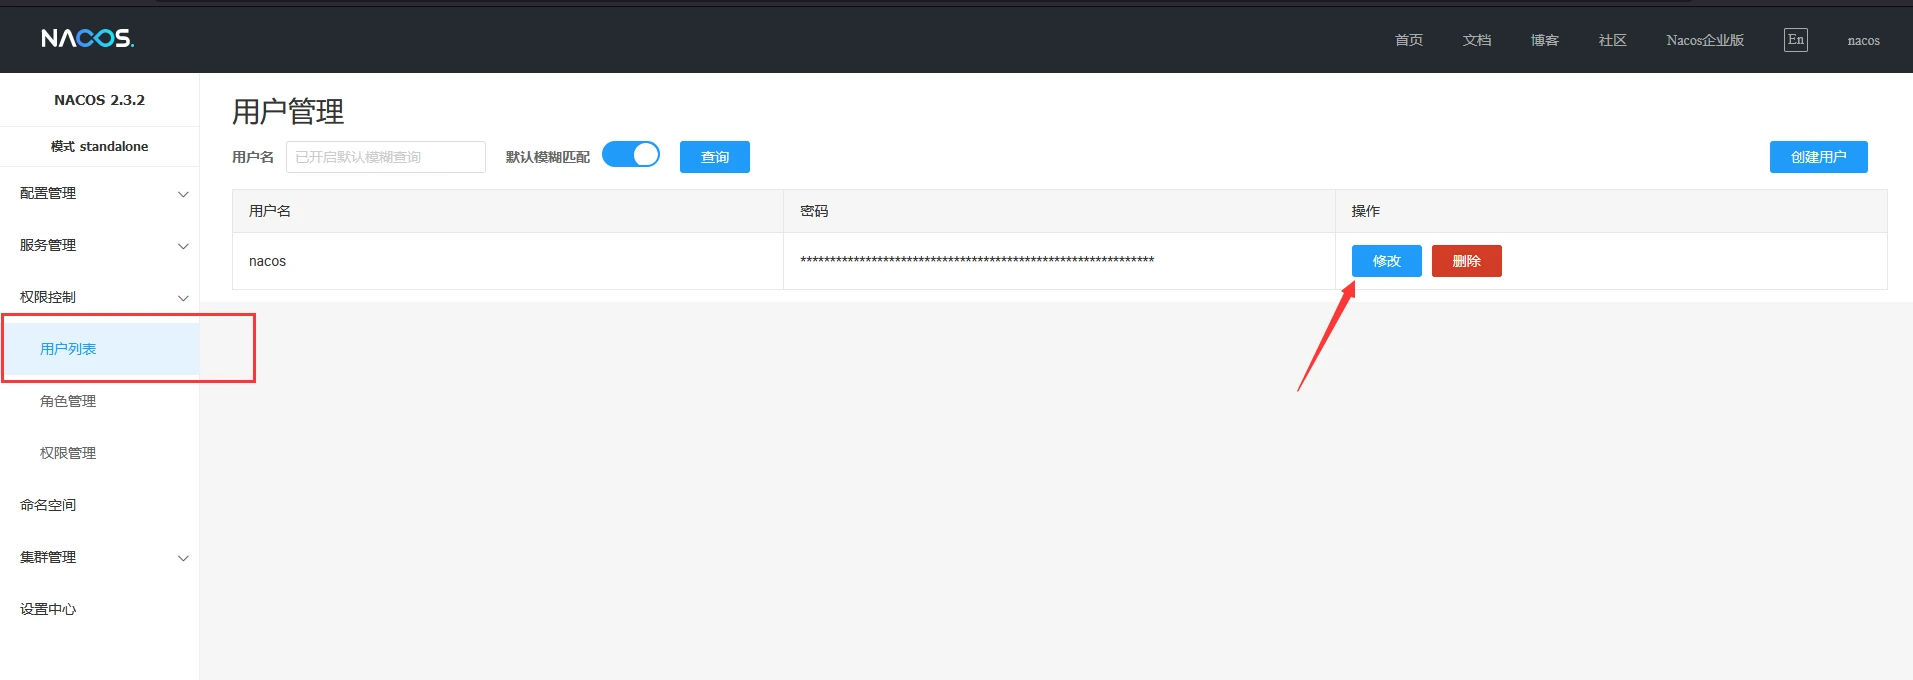
- 在菜单中找到 权限控制 -> 用户列表。
- 在列表中找到
nacos用户,点击修改按钮。 - 输入一个复杂度较高的密码
- 确定
- 退出系统重新登录确定新密码已生效。
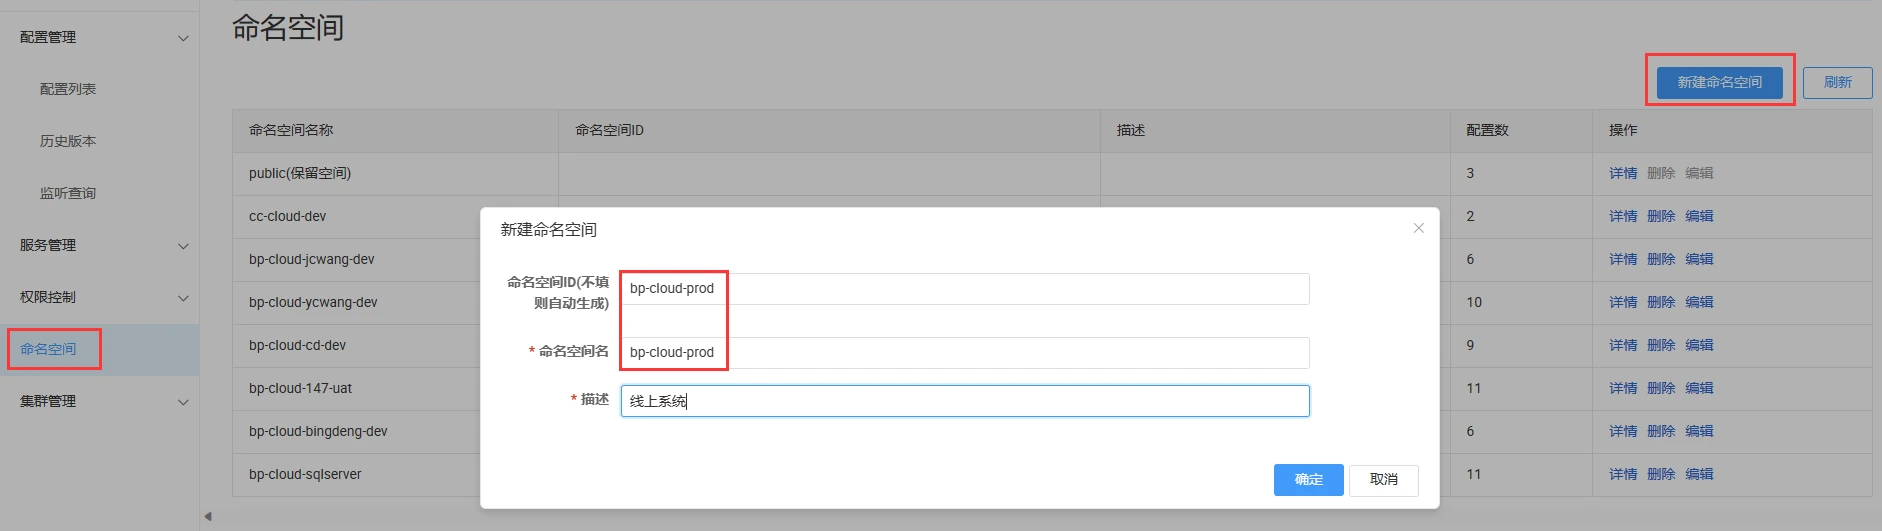
创建命名空间
创建一个新的命名空间供项目使用,我们不建议使用默认命名空间。
警告
命名空间ID 才是 application.properties 中的 namespace 值,命名空间名称只是用于方便用户识别的一个名称。
重要
命名空间 ID 不建议不填,建议填写一个纯英文的字符串。
- 填写一个纯英文的命名空间 ID,例如
bp-cloud-prod。 - 填写一个便于分辨的命名空间名称,例如
bp-cloud-prod。 - 填写描述信息,这里可以使用中文描述。例如
生产环境。